


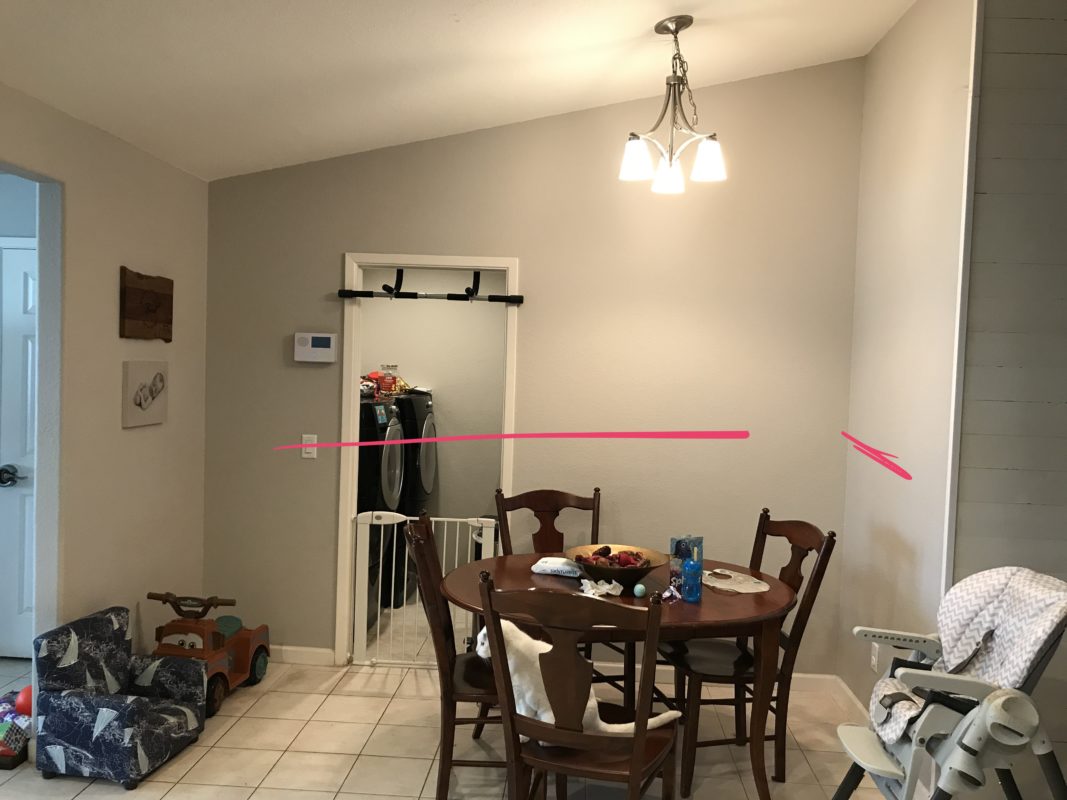
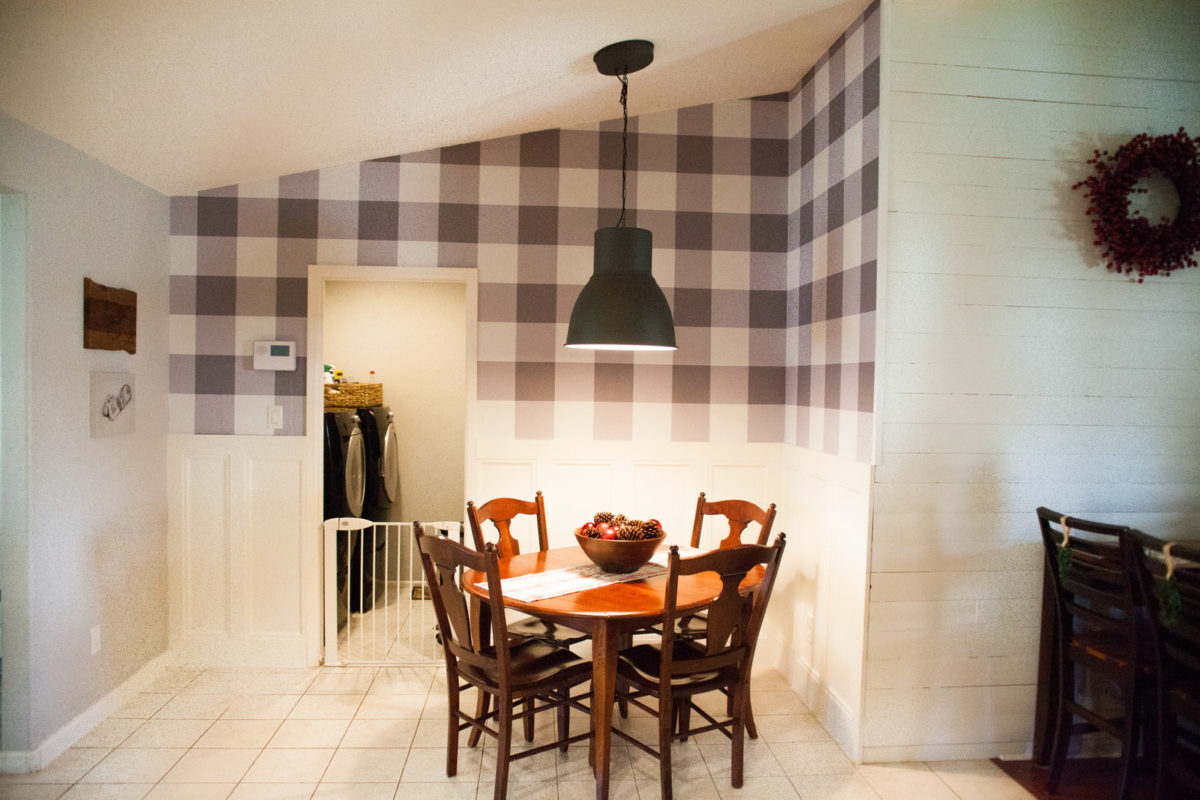
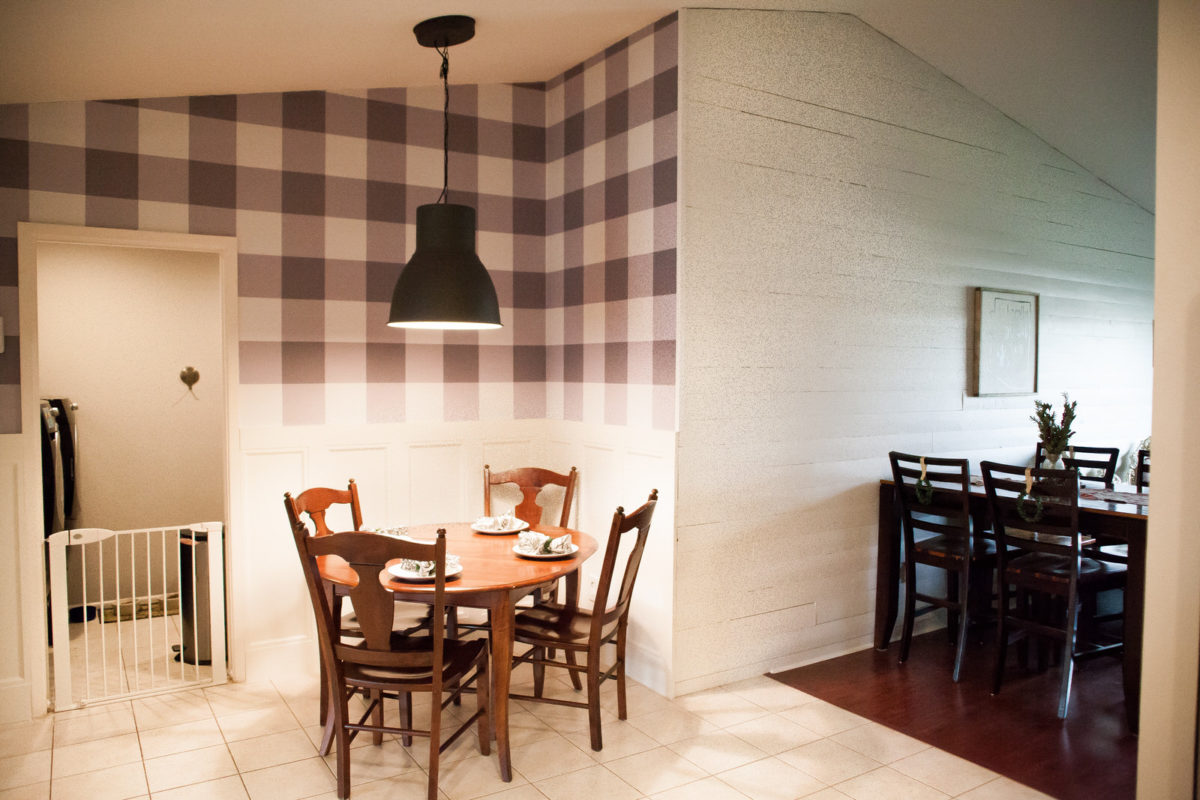
Do you have a space in your home that kind of feels like it gets lost? Is a waste of space? I felt like that about our kitchen nook. Aside from the boring lighting fixture the space was just awkward to me.
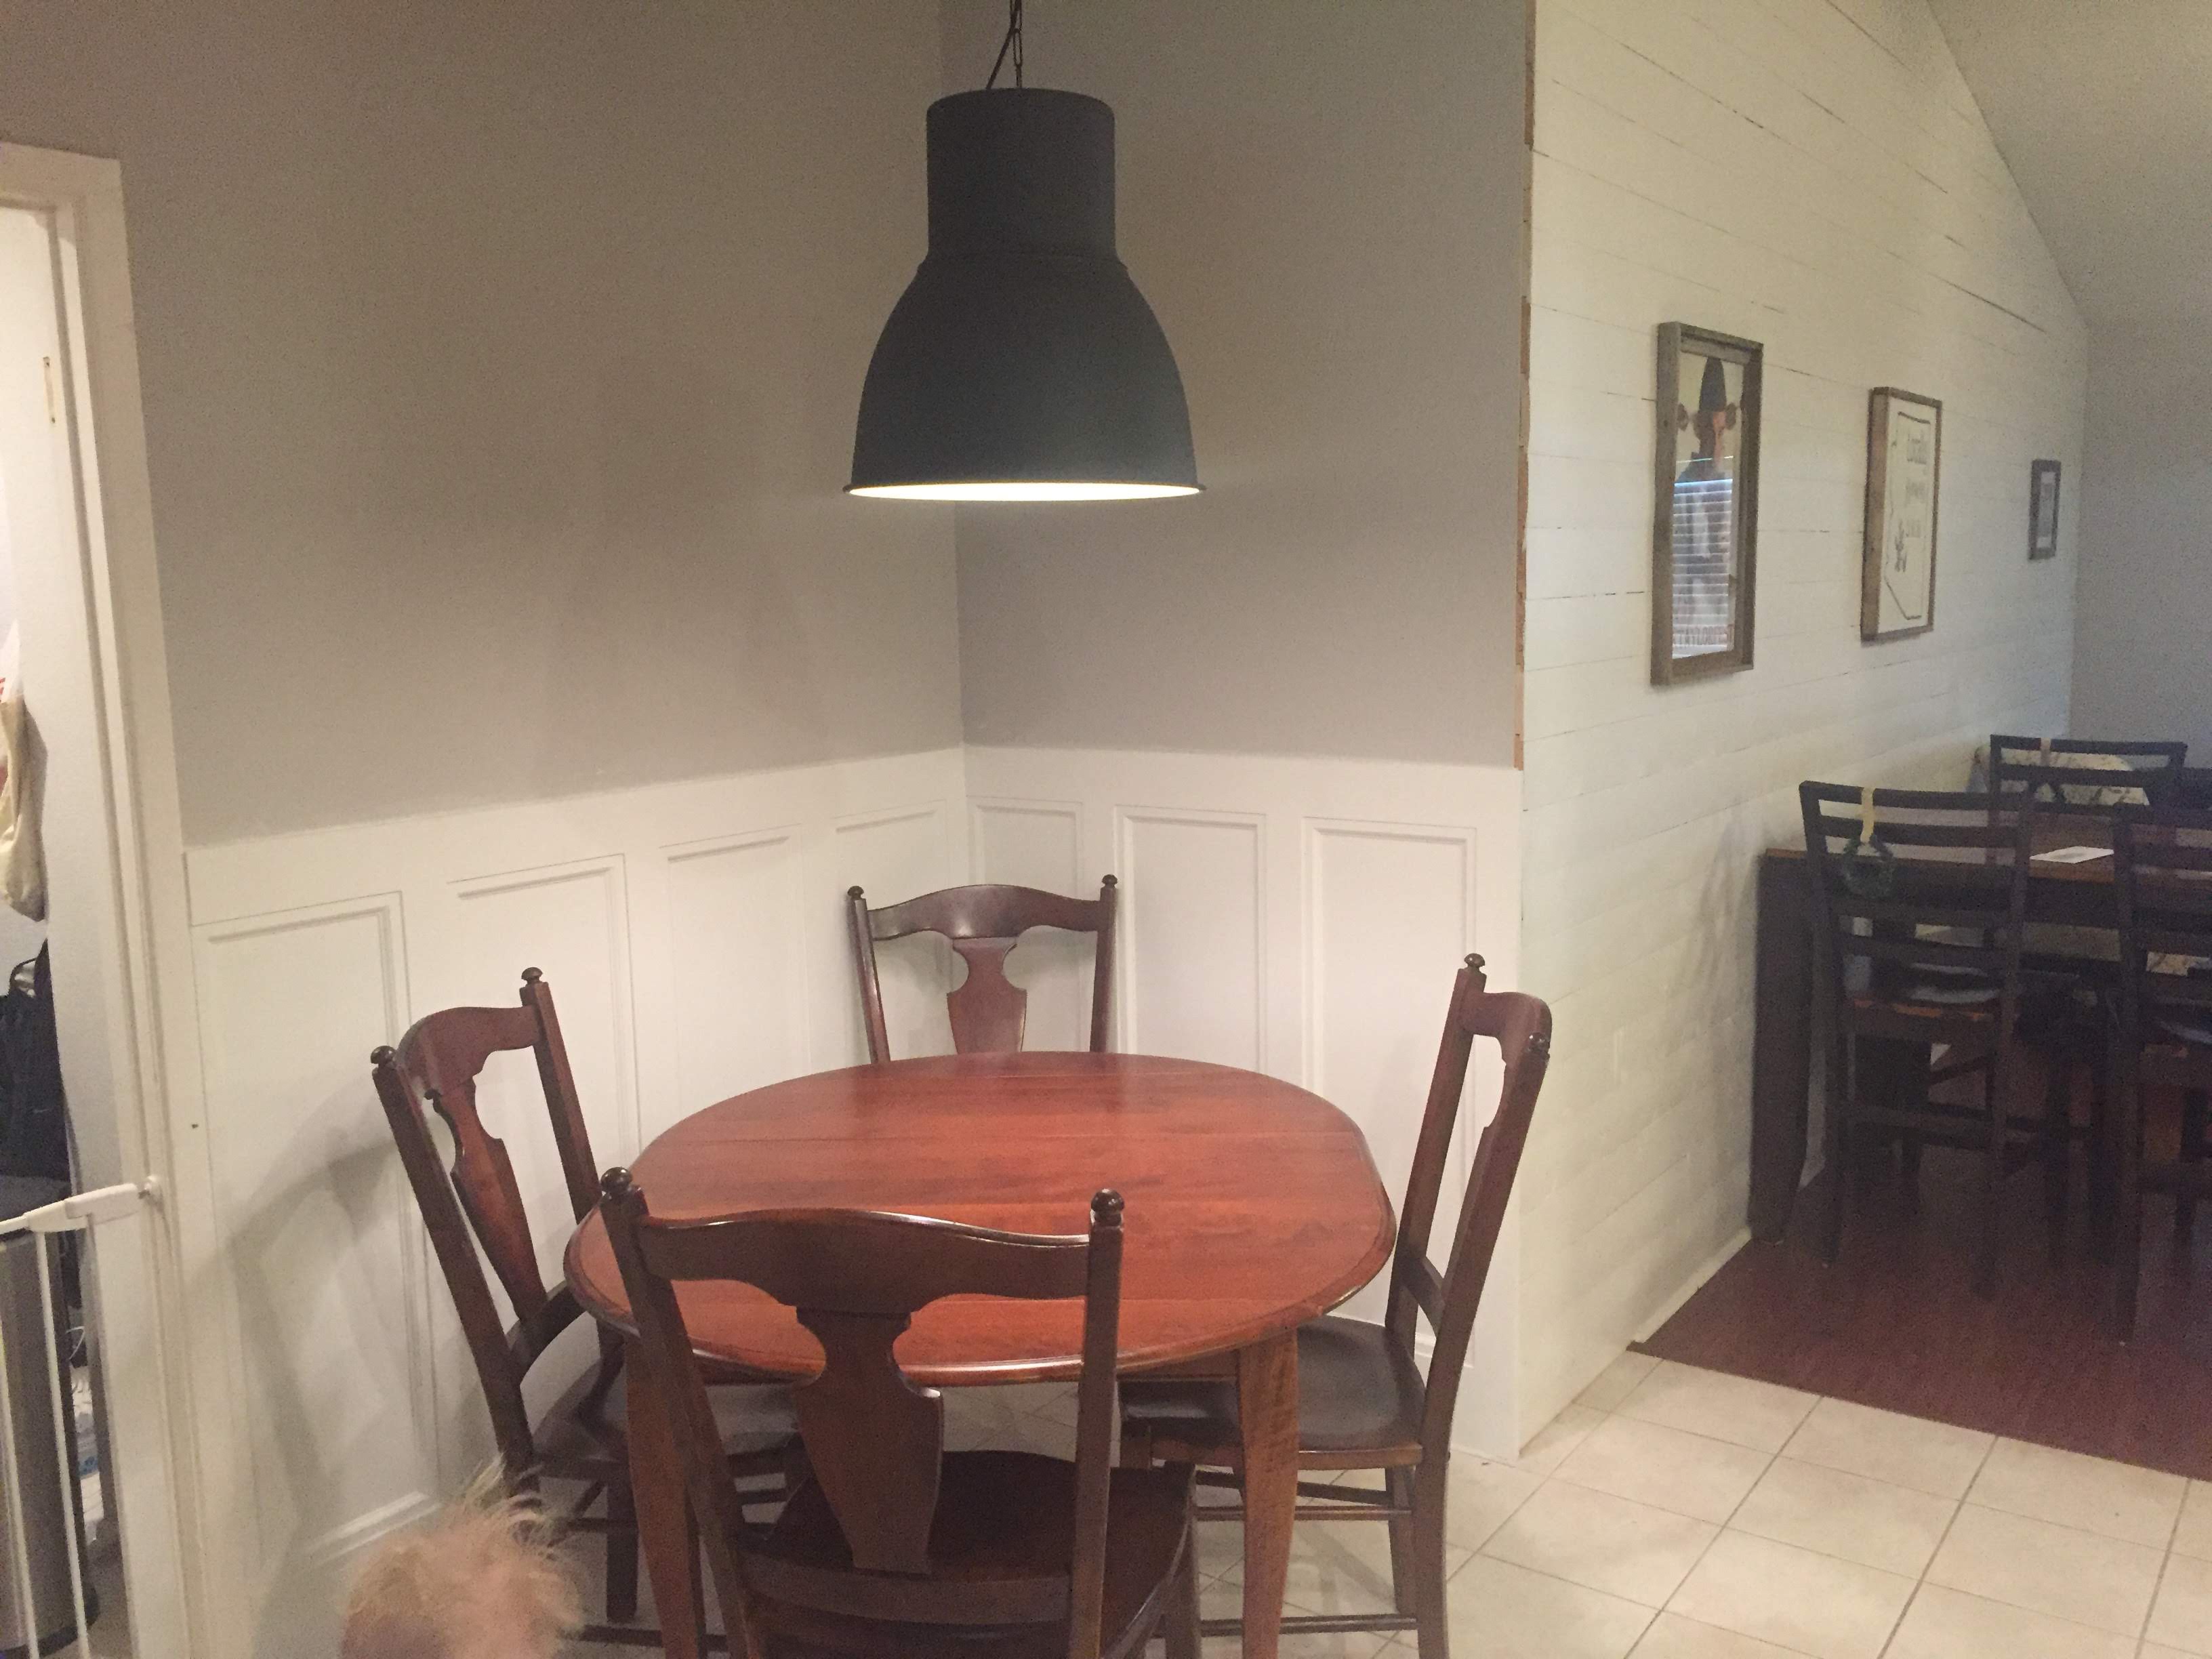
I wanted to give this corner some purpose, make it eye-catching, and the result was even better than I imagined. We chose this grey gingham removable wallpaper from Loomwell, DIY wainscoting, a new light fixture from Ikea to spruce this space up.
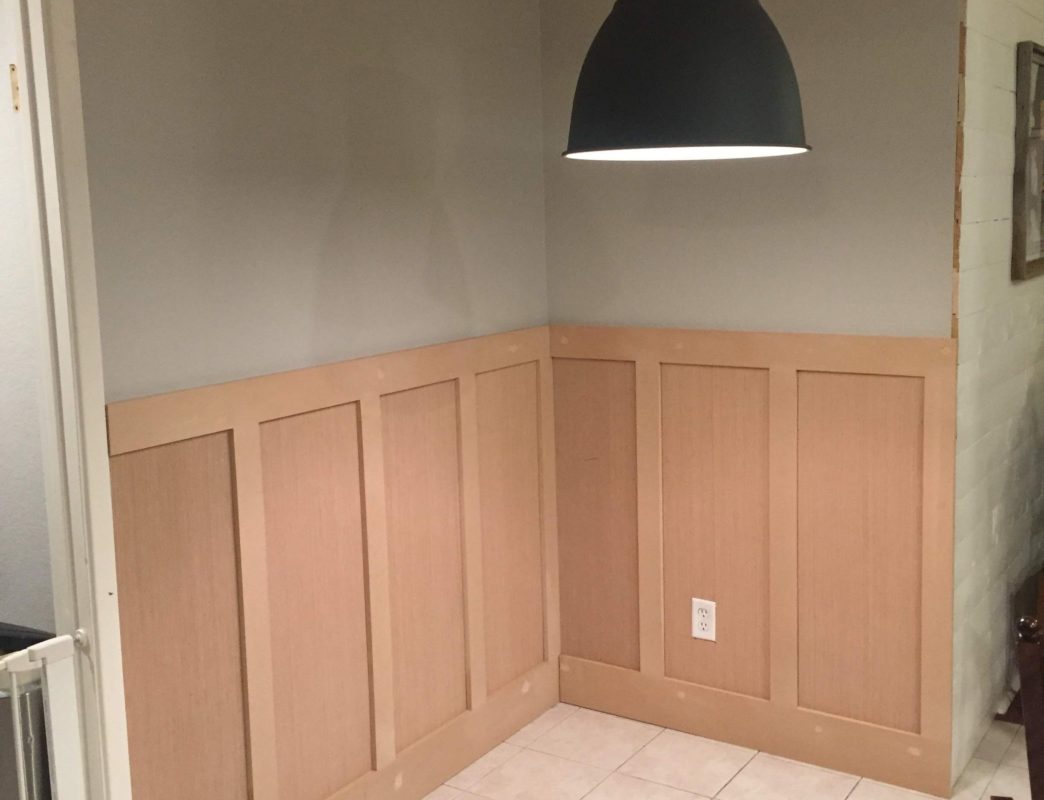
DIY Wainscoting
For the bottom half of the nook we chose to make our own wainscoting, it complimented our DIY shiplap dining room wall – Thankful for handy friends like Bill Harden + a hubby is who always game for taking on a new project.
I’m passing the keyboard to said hunky hubs to outline the steps in this DIY Wainscotting section
Taylor here 👋
Before I get started, let me begin by saying I am maybe slightly above average on the handyman scale. I’m more of a “Tim The ToolMan Taylor” and I call in my assistant Al to ensure I don’t start a fire or electrocute myself . I say this because I use these projects to sneak in some guy time with my buddies who are far more skilled than I with tools much nicer than mine!
My good friend (and realtor) Bill came in clutch on this project! Me doing much of the cutting at Bill’s shop meant I had to be extremely precise with my measurements…my father always taught me “measure twice, cut once.” Valuable life lesson Padre!
Quick Overview:
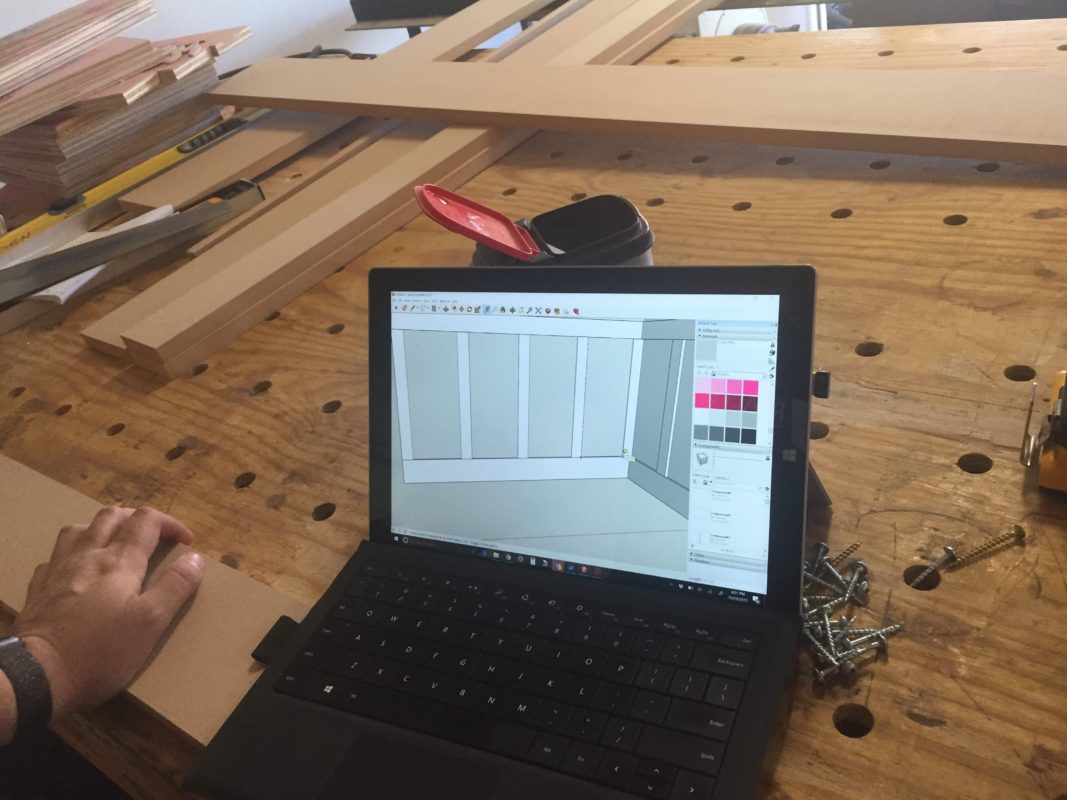
We used a table saw, so we cut out individual panels to fit flush between stiles and rails. If you don’t have one you can simply measure the panel to fit the entire area and secure this to the wall. (Pro tip, Home Depot / Lowes will happily cut any wood you are buying from them.)
Bill and I used a kreg jig to ensure the rails and stiles were flush and secure. If you don’t have one, you could truly skip this process and still have quality results. I would recommend using a spacer block to ensure consistent distance between the stiles. This also helps you avoid any mistakes like slanting stiles from top to bottom.
We chose MDF over wood as MDF is nearly flawless and defect-free.
(be very careful with cutting MDF in an enclosed area as there are safety concerns with the dust emitting formaldehyde)
With work, family, and your child’s sleeping schedules I would look at tackling this project in stages. You will find yourself waiting for putty and coats to dry, etc, so don’t feel obligated to tackle this in a day.
Supplies You Will Need:
- ⅛ inch project panel – Home Depot
- Liquid Nails Panel Adhesive Home Depot
- ¾ in x 4in stiles MDF Home Depot
- ¾ in x 6in floor rail Home Depot
- 2 ½ inch nails to secure stiles and rails to studs
- 1 ½ inch nails to secure panel and detail molding
- Wood glue and filler Home Depot
- Panel molding Home Depot
- DAP Latex adhesive Home Depot
- Painters tape
- Primer
- Paint
Tools You Will Need:
- Stud finder (brace yourself, your husband will test this on himself)
- Nail gun/hammer
- Level
- Putty Knife
- Circular Saw
- Mitre Saw
- Pry bar
Prep steps:
- Determine which wall(s) will be receiving the wainscoting trim, clear the walls and surrounding areas of all furniture and any hanging photos, artwork, etc…
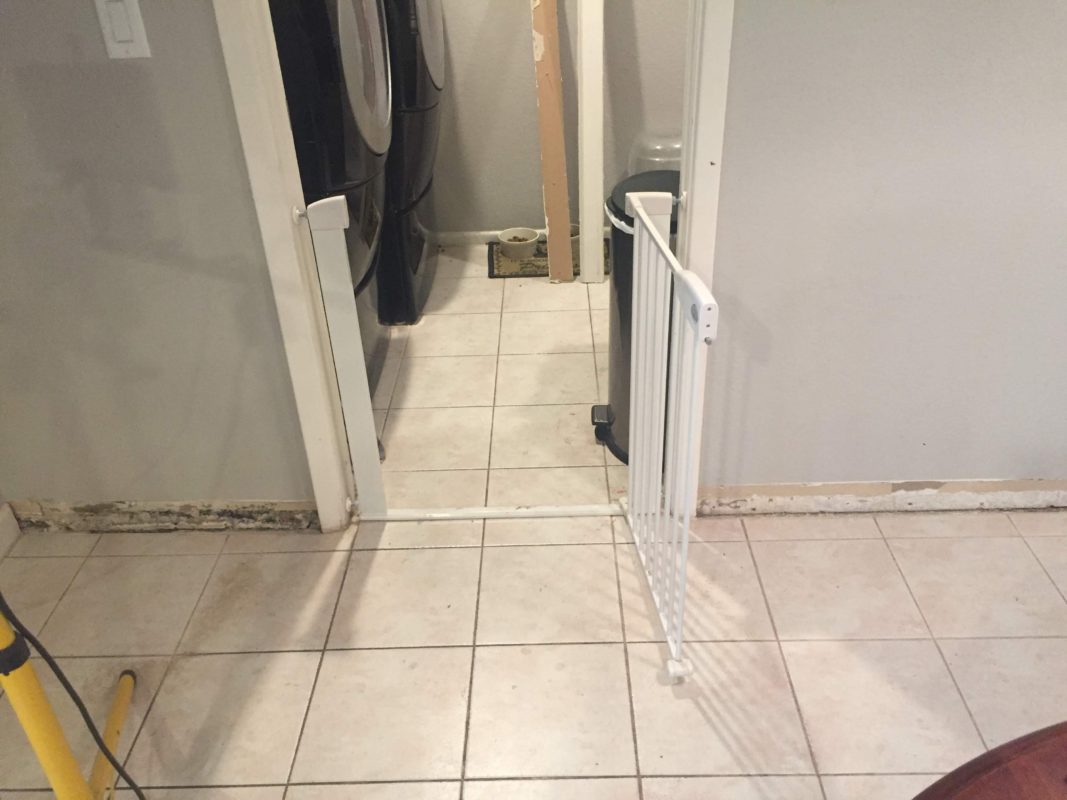
- If you have a doorway on the wall you’re putting wainscoting on you’ll need to decide if you’re going to replace the door trim (casing) or butt up directly to it.
- Remove all baseboards, door casings, electrical outlet covers, or any other items adhered to the wall. If your baseboards are set inside the tile, you’ll want to exercise caution when removing them so you don’t damage the tile or grout. (Real world note – damage the grout all you want, its easy to reapply.)
- Determine how high you want the wainscoting to come up the wall. For this application, we’ll use an example of 4’ high from the floor. You’ll also want to decide on the layout of the uprights (stiles) – how many of them do you want to see on the size of wall you’re doing.
- Assuming the following, we’ll continue – Total height – 4’, Top rail 4” thick, bottom rail 6” thick, interior stiles 3”, stiles 28” apart. Let’s also assume for an example we’re putting wainscoting up on a wall that is 8’ long, to keep things simple.
- Begin by ripping your material down on the table or circular saw – for our wall we’ll need an 8’ length at 6” wide and 4” wide. We’ll also need a number of stiles cut at 3” wide. The overall height of our wainscoting is 4’, so subtract out 10” for top and bottom rails and that will tell you that the stiles need to be 38” long by 3” wide, you’ll need two 8’ lengths to get the stiles for an 8’ wall section here.
- Once you have your cuts completed, make sure to take a sander to the sides of the material that you cut – you’ll want a smooth finish and some cheaper table saws or circular saws might leave blade marks. You’ll also want this smooth and flat so it accepts the joinery of the stiles cleanly.
- It’s best to lay out your cuts in the position they will be in when they go up on the wall. This will allow you (and your boss/significant other) an official opportunity to make any changes before you glue and nail this bad boy up to the wall and will not want to pull it off.
Assembly Steps:
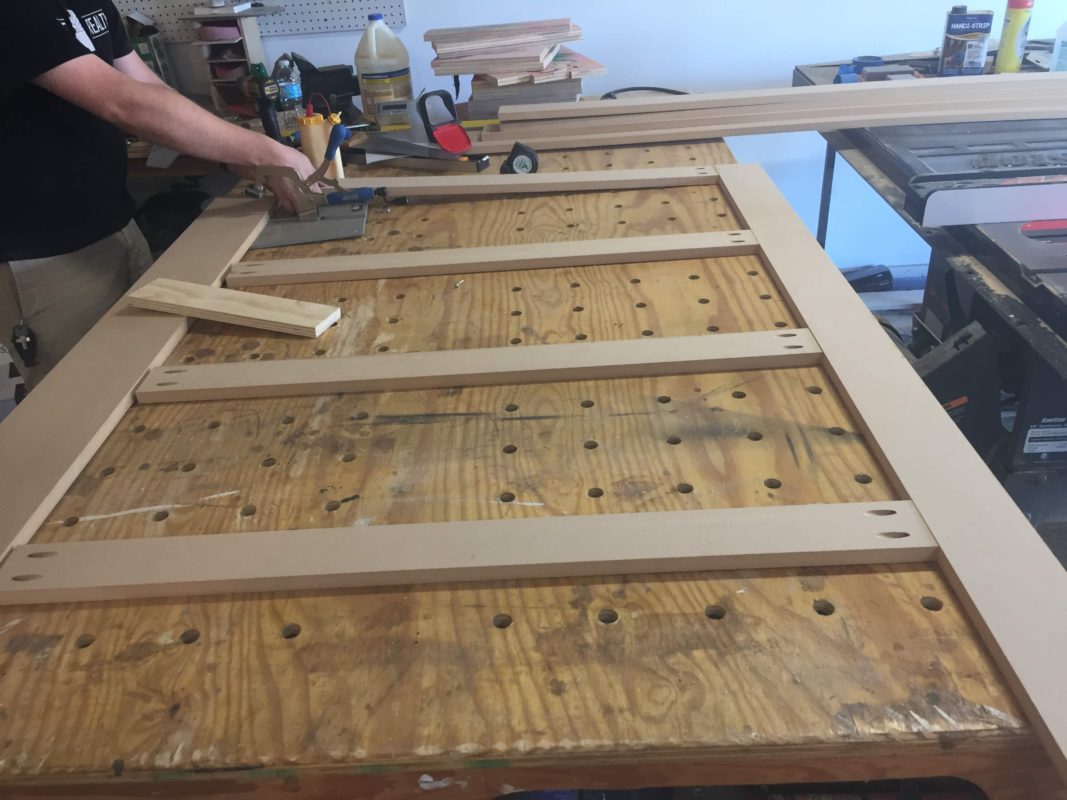
- We used a Kreg Jig K5MS to do pocket hole joinery for this project. So set your jig to work with the size of wood stock you’re using, and drill two pocket holes into the top and bottoms of the upright stiles. The top and bottom rails will not need any drilling.
- Cut a scrap piece of wood to the exact length of your stile gaps, this will make the assembly easier and ensure that you’re square and all openings for the panels are the same.
- Using wood glue, attach the first outside stile to the bottom rail. Lay down your 28” (or whatever yours is) spacer block, then glue and pocket hole screw the next stile. Continue until the end of the run attaching to the bottom rail first.
- Attach the outside top rail flush to the outside of the stile, then continue to glue and screw the rest of the stiles to the top rail. It will help to use a speed square to make sure you’re screwing these stiles in square. You’ll see why if you ignore this and have to make wonky cuts on your interior panels – sorry in advance if you don’t square up your stiles now.
- Use a damp cloth and remove any surface squeeze out glue – this will save you time on the sanding. You’ll want to let the glue set and cure for a little bit, even though you have a mechanical connection in the pocket hole screw. MDF plywood CAN and WILL snap if you put too much pressure on a weak point, so let the glue set.
Sanding:
- Get your sander (I use a DeWalt and a Festool random orbital sander) and begin to sand down the areas of the MDF at the joinery where you aren’t initially dead flat, or have any glue Sanding: or inconsistencies in the board. I typically use 120 grit for initial glue removal and flattening, then 220 grit for the finish pass. Blow off the dust from the sanding and then wipe down with a VERY SLIGHTLY damp rag – you don’t want to introduce a bunch of water to a freshly opened/sanded MDF board – it will swell and not finish well.
Once sanded and dry – you’re ready to slap that thing up on the wall!
- Make sure you mark on the wall the areas of your studs – this will help you when you go to secure the MDF rails and stiles.
- Lift the paneling into place on the wall and do a dry fit to see where you may have any minor issues to correct. (You may now be cursing the man who installed that door jam slightly crooked, or the guys who framed that corner wall that is definitely not square and plumb. Assuming you don’t have these issues, continue…
- Glue/Adhesive – put a quarter size dollop of liquid nails adhesive on each corner, and about every 16” along the top and bottom rails, and one in the middle of each upright stile. The thought here is that you don’t want to go overboard – if you have to remove the paneling at some point you don’t want 100% of the drywall coming along with it creating more work or money spent for you.
- Run a 2” finishing nail into the top and bottom rails where they line up with your studs. If you have some wave in your wall you may need to add some extra nails or screws to flatten it dead against the drywall, but anything under 1/8th of an inch can be caulked without the woodworking gods looking down on you. You’ll now have the skeleton on the wainscoting secured to the wall!
- Back out to the shop you go – its time to cut the interior panels from our 1/8th inch craft board (this is the pink plywood stuff you can get at home depot). Use this rather than a masonite or MDF material – it tends to paint and finish a bit easier.
- Our interior panels, since our math was dead on and our execution of square joinery was flawless – are 28” by 38”. You’ll want to cut these about a ¼” shorter so you have some room to move them around inside the panels. So cut 3 rectangles of this material at 27-¾” x 37-¾”. The eighth of an inch of space on either side will be covered by your step down trim.
- Dry fit each panel to make sure you’re fitting without any goofiness – then once satisfied, go ahead and put a little bit of glue in the center of the panel so it sticks in the middle. Place it into the frame and use a pneumatic staple gun to pin all round the outside of the panel to the drywall behind it.
- While that’s drying, you can be prepping your cuts for the interior trim that will cover those staple marks. These will be standard 45 degree miter cuts on each side, and its best to handle each interior square at once if you’re not used to cutting miters. You’ll want to buy a ton of this, because if you’re beginning your DIY career, you’re going to mess this up a couple of times, which is alright! Go for tight miters, that’s the area that your eye will automatically go to when you’re walking past this wainscoting for the next decade, and if its short or has a gap in the center it will annoy you everytime you walk past it! So take your time and get these miters right.
- Once you have the interior trim cut, nail it up with a small finishing nail – 2 nails at each corner and one about every 8 inches on the runs.
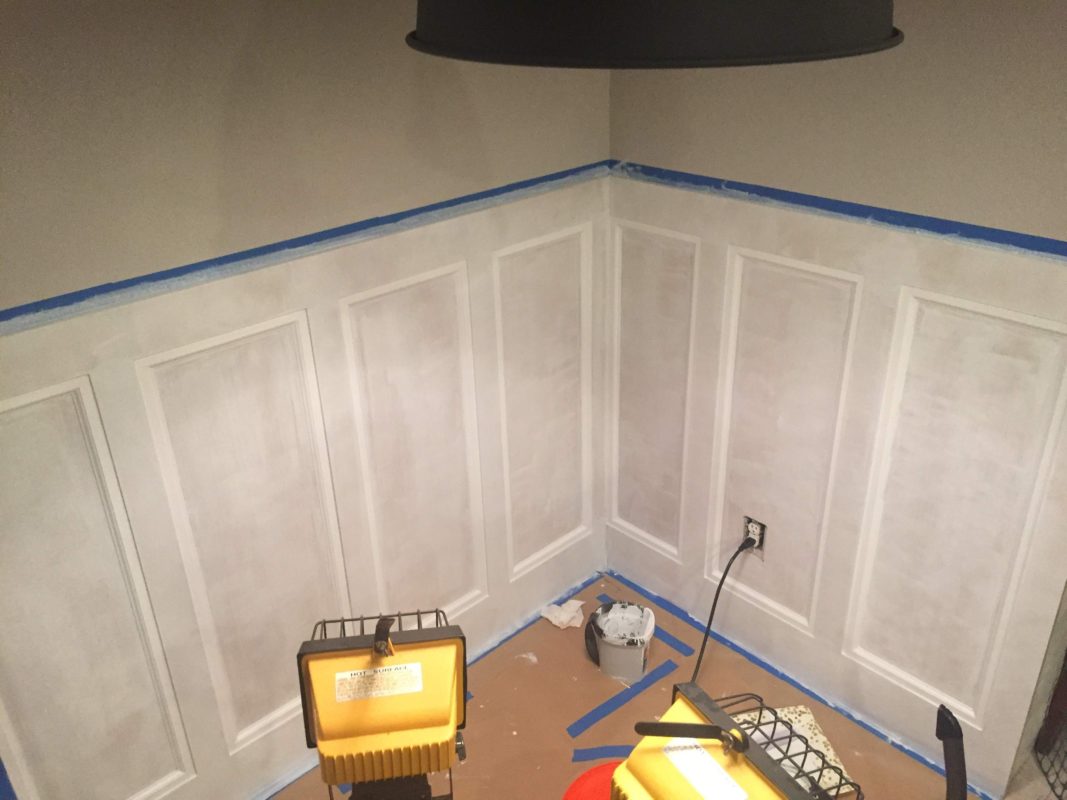
- Using a flat putty knife, apply wood filler to the areas where you had to nail the panels up to the wall. Let that dry for an hour or so then go back at it with a 220 grit sanding and make that hole disappear. Then using a painters caulk, hit the top perimeter of the wainscoting, and if necessary, the interior of the trim and panels. Use a wet rag to clean up extra caulking. The best kind of caulking job is the one you can’t see has occurred. Let that caulking dry all the way! If you have larger gaps that need caulking there’s a good chance it will shrink and crack when dry, so you may need to hit it again.
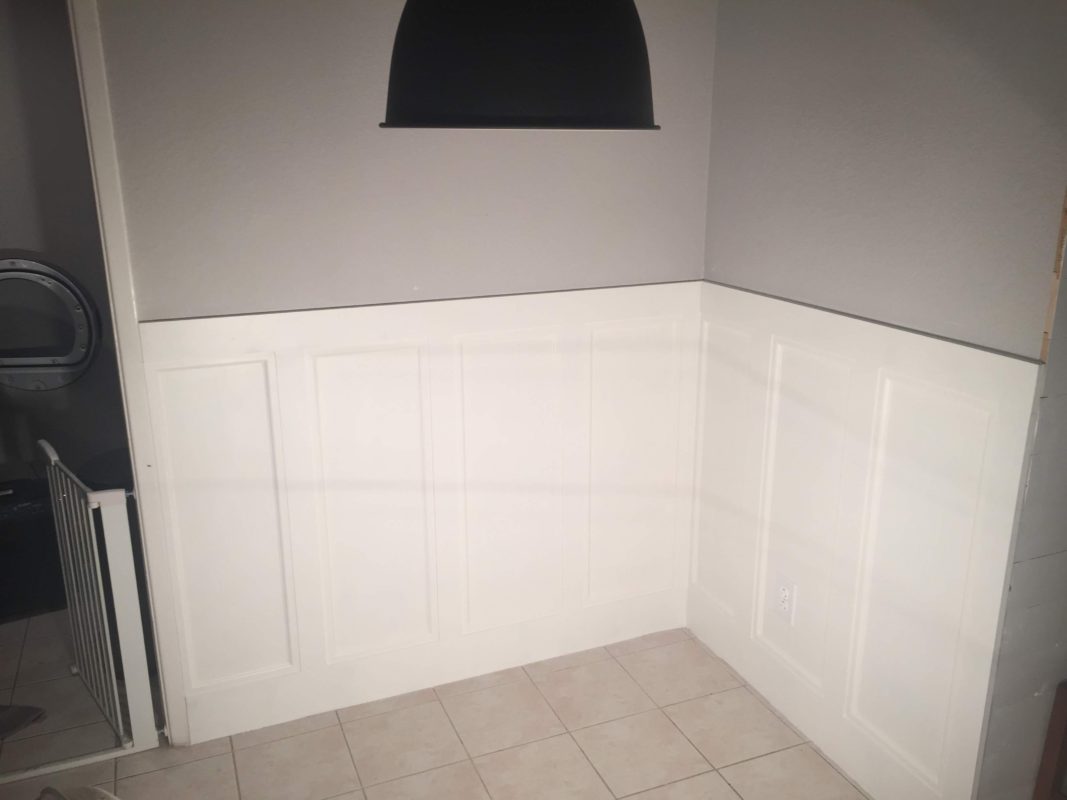
Paint Away:
ALWAYS ALWAYS ALWAYS use a primer coat on MDF material, it will help lock up that surface and accept your fancy Sherwin Williams paint of the year color without having to paint 5 coats.
Congrats! You’re now dangerous enough to handle a full scale property renovation – at least that’s what HGTV will tell you!
Hey Y’all I’m Back
– Whitney
Not Your Grannies Wallpaper:
Before about a year ago the word wallpaper gave me major granny vibes but wallpaper has been reborn, better than ever, and is the easiest way to make a statement in your space.
The wallpaper is incredibly simple to install, and very easy to remove.
The two biggest challenges were keeping the pattern aligned (the paper comes in 2 foot panels so ensuring that they lined up vertically and horizontally was imperative because of the pattern we chose and installing on an angled wall. All in all, simple to install – anyone could do it!
How we decided how much wallpaper to order:
- Measure wall top to bottom ( for this space we measured from the highest point since the wall was at an angle
Subtract the height of the wainscotting 10 feet -4 feet = 6 feet - Measure the walls width ( the width of the area we were installing wall paper to is 14.5
- The paper comes in 2 foot wide panels (you select the length) so we ended up needing eight 6 ft length panels
Supplies:
- Scissors
- Exacto Knife
- Level
Passing the blog back over to my better half to talk about installing this gorgeous wallpaper as he definitely took charge on this project.
From Taylor: Hi Again! As excited as I was about how the wainscotting turned out, I couldn’t imagine this nook without the Anderson Loomwell Wallpaper. As a man, it is typically my first instinct to not read the directions and never ask for help. In the case of this project, I highly recommend a partner and game plan. This nook was quite challenging because of the angles and pattern. We had to ensure the continuity of the pattern while working around tricky angled ceilings.
To get started:
- Pick a corner and start from the bottom.
- Stick the adhesive wallpaper flush to the bottom of your wall, you can simply remove and reapply until you get a perfectly flush application.
- Use your fingers, a putty knife, or a ruler to smooth any bubbles out as you move your way up the wall. Here is where a partner can be very helpful, rather than removing the entire backing at once, you can have your partner cut the excess backing as you go. This strategy will become very helpful as you reach the top and can potentially save some of the excess for other areas.
- Once you reach the ceiling or corner, use a utility knife to cut a precise line. Now you can start this process again now starting flush with both the bottom and the applied wallpaper. * Loomwell will # each 2ft panel so you can keep the pattern lined up correctly.
- It is helpful for your partner to hold the excess wallpaper and guide you to a nice flush application to the already applied wallpaper. Your partner essentially guides the wallpaper while you apply it evenly to the wall. Continue this process until your complete.
Let there be light
You know you’re adulting when you get jazzed about light fixtures amiright? So I was super underwhelmed by the light fixture that came with our home, I always have major heart eyes over these pendant light fixtures that have a rustic vibe. This 19′ grey metal pendant lamp the HEKTAR from Ikea fit our vision perfectly.
What’s next?
We’re now obsessed with this space, the pattern feels trendy and timeless at the same time, the wainscottng sparks lots of joy and that light fixture is oh-so-dreamy. Next up on our DIY bucket list is adding a barndoor to close off the laundry room and really make this space feel complete.
I’m also dreaming up ways to brighten up our kitchen and I think our cabinets may be my next victim – watch out dark wood this mamas got a paintbrush and I’m not afraid to use it ( well maybe a little afraid)
