

How To Turn Your Baby Into The Elf On The Shelf: Including tips for a DIY hat and collar.
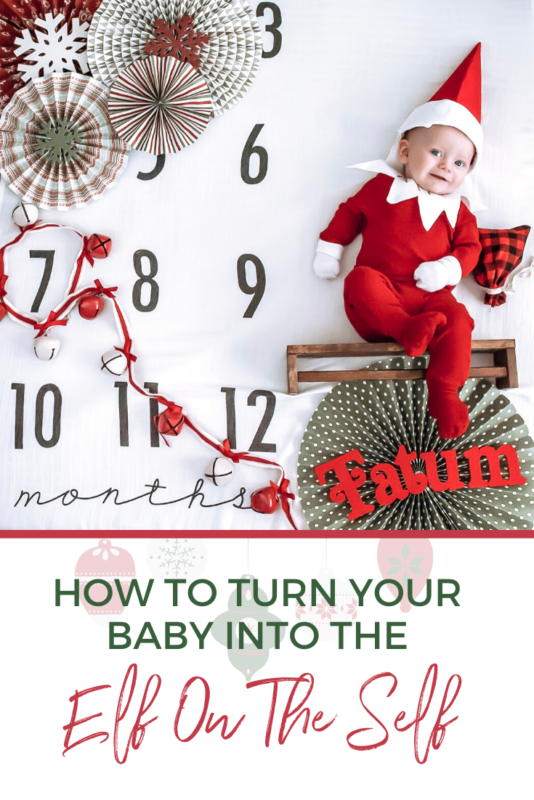
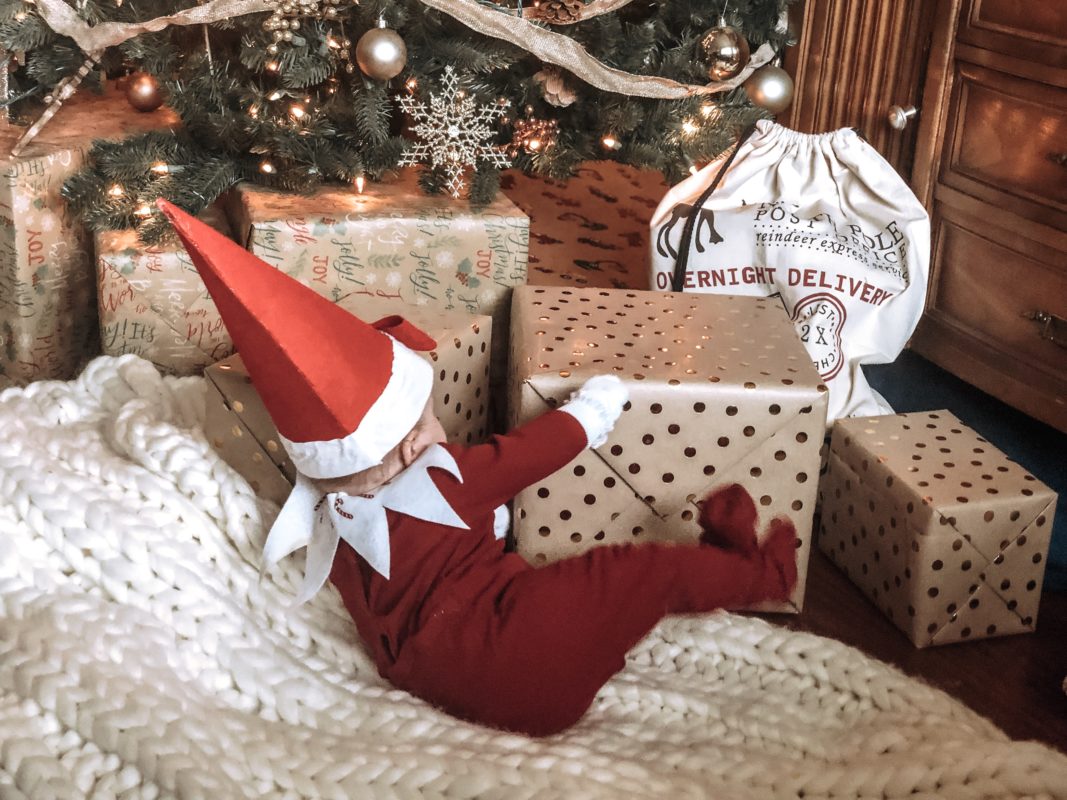
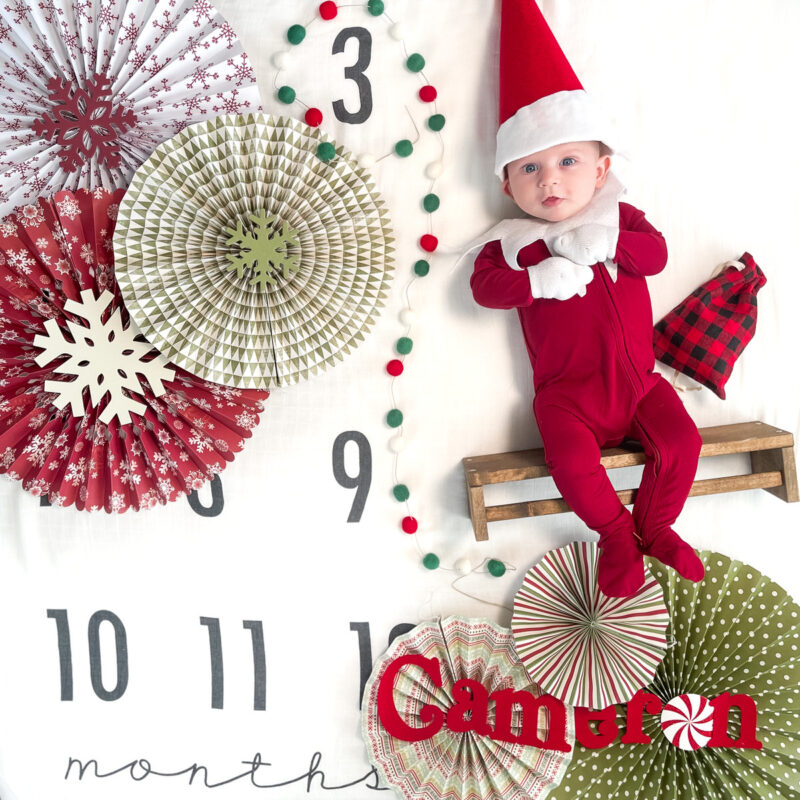
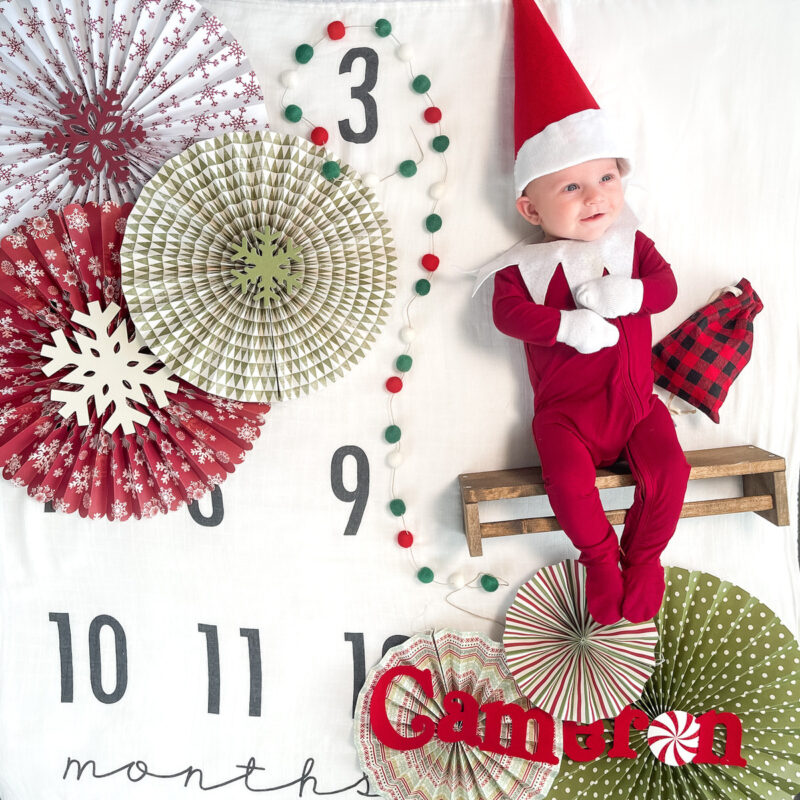
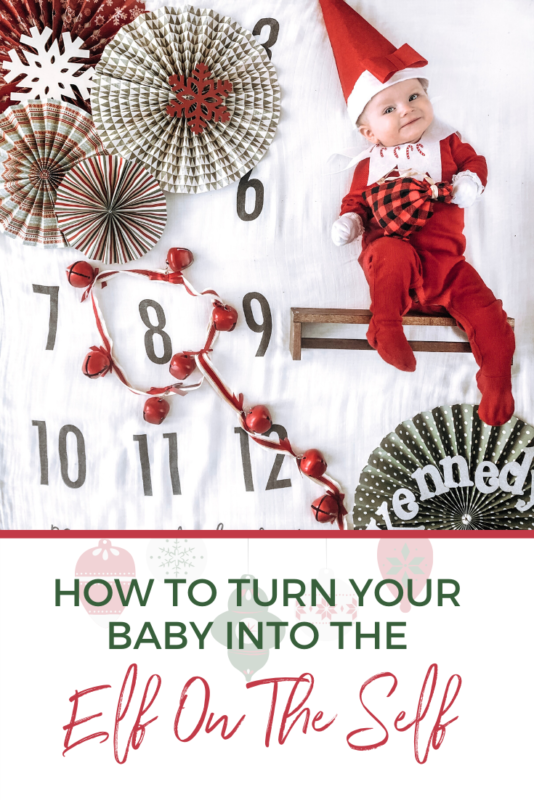
When my kids were babies I did these elaborate monthly photos for them, and while it’s hard to pick a favorite, them dressed as the infamous Elf on the shelf was SO much fun I just couldn’t help but repost it year over year. I have this photo of my son hung in my office and I smile ear to ear looking at this jolly little guy.
I put together a list of everything you need to recreate this cute photo yourself! I made the collar and hat myself and will provide DIY instructions below, I chose to make the hat because I wanted it to be as authentic as possible and finding an extra tall, stiff hat was challenging.
- Solid Red Pajamas
- White Socks or Mittens for hands
- DIY Elf On The Shelf Hat
- DIY Elf On The Shelf Collar
- Spice rack shelf (you can also get this from Ikea directly!! We stained ours)
- Batz Kids Milestone Blanket
- Rosettes
- Felt letters for name
- Gift Sack (Target dollar section)
- Bell Strand ( we found ours at Homegoods)
If you want to skip the DIY hat and collar here is an option you could try this Newborn elf jammies with hat.
Gather the following craft supplies and get ready to make a cute and simple DIY baby elf on the shelf hat and collar! My kids were 7 and 8 months when I took these photos of them so you may need to adjust to fit them.
Supplies:
- Scissors
- String or ribbon
- Hot Glue gun + glue
- Pen or pencil
- 12×18 paper
- 12×18 Red Stiffened Felt sheet 12×18” (Can be found at a local craft store as well, I got mine at hobby lobby) 2 sheets minimum
- White felt or fabric (non stiff) ( you can get a big roll or get a sheet like this )
- Thin elastic
- Velcro, snap, button, or string (choose one of these listed for step 5 in the collar instructions below)
DIY Elf on the shelf hat:
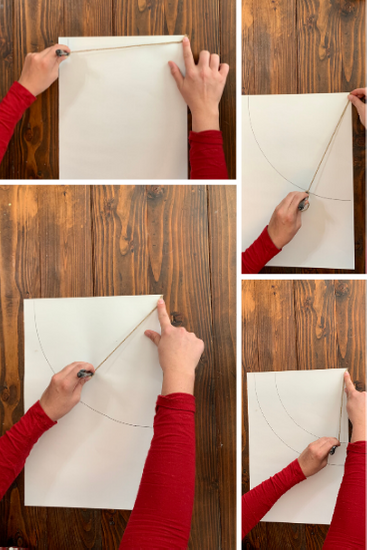
Sept 1: cut two pieces of string one 12 inches one 9 inches
Step 2: tie the 12” string around the pen & hold loose end in the top corner of the paper, draw an arch
Sept 3: tie the 9” string around the pen & hold loose end in the top corner of the paper, draw an arch
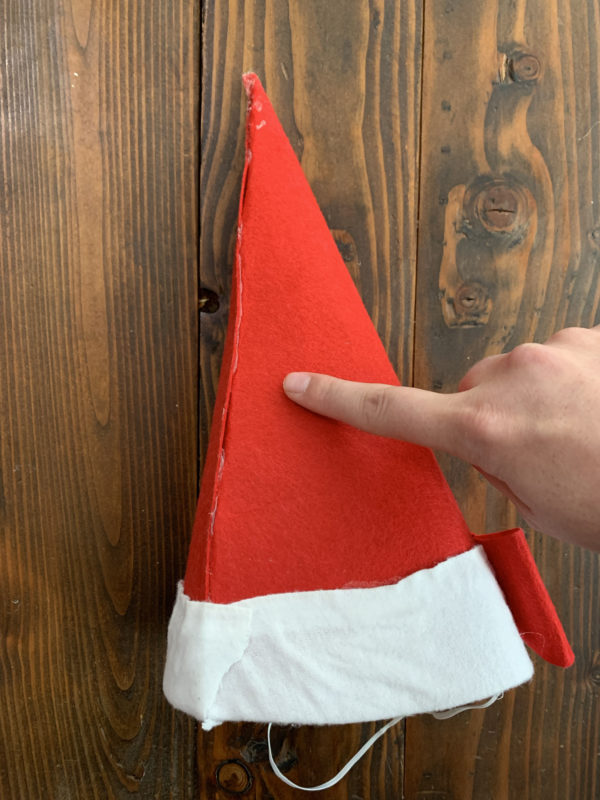
Step 4: Cut along the 12” arch line then take that template and cut your red felt to match
Step 5: Cut along the 9” inch line, now you should have an arched strip, lay that template on the white felt fabric and cut it out
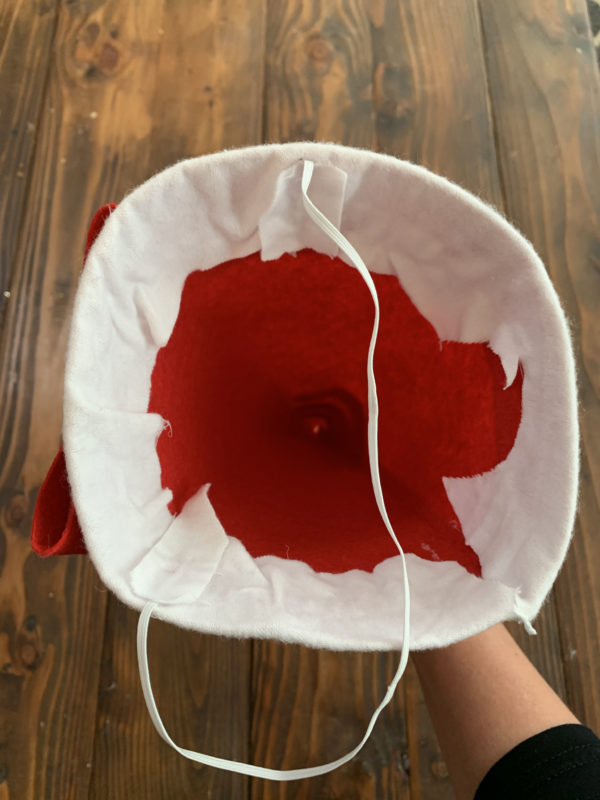
Step 6: Hot glue the white felt around the base of the red felt bottom to make a white border (I folded a bit under so there was no red showing at the bottom. Rounded/ arched objects are difficult to get perfectly flat, don’t stress about that just do your best.
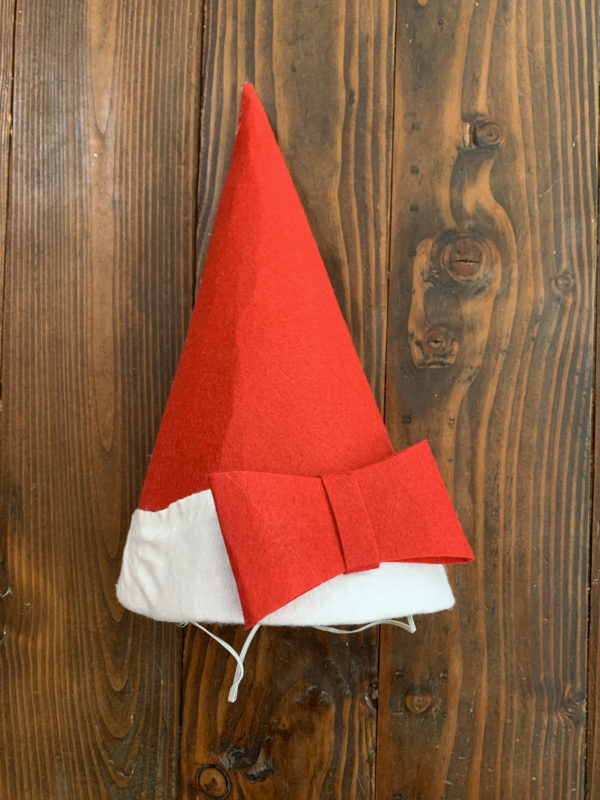
Sept 7: Hot glue the edges of the red felt together (I folded a tiny lip on one side to make it easier. * grab a paperclip or chip clip to hold the bottom end together while the glue cools.
Spet 8: Add a little strip of elastic to make the hat stay on like a party hat. Measure on your child first (hot glue on the inside of the hat!)
DIY Elf on the shelf baby collar:
Step 1: Print this template out and cut around the entire thing
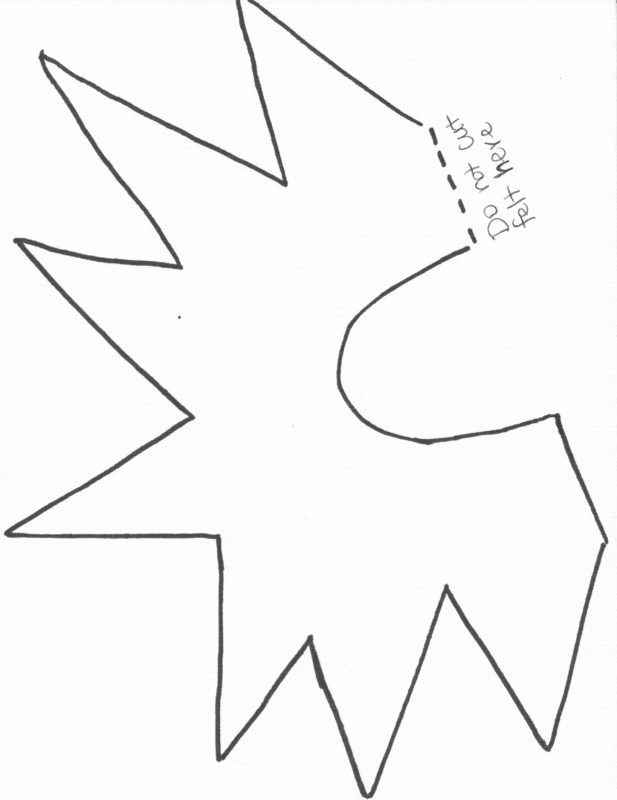
Step 2: Fold your white felt in ½ and position the template on top, align the fold part of the template along the folded edge
Step 3: Trace around the edges, noting where the fold is ( don’t cut this part)
Step 4: cut out the felt everywhere except where the fold is, once it’s cut you should be able to open it up and it will be double the size of the template
Step 5: on the open side attach snaps, velcro, or simply poke holes and tie a ribbon through to fascine the ends together (something that will allow you to get it on and off baby)
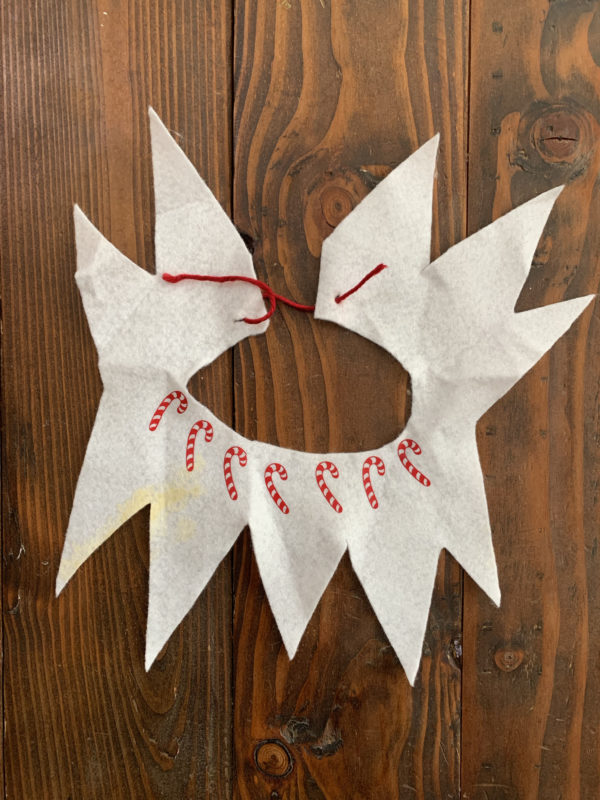
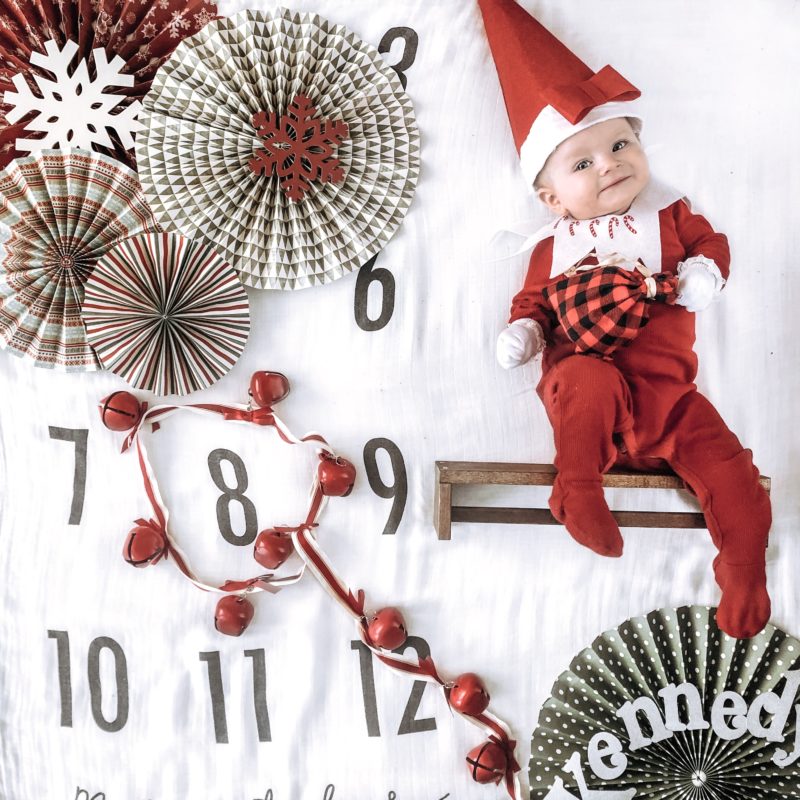
I have a Cricut machine so I cut heat transfer vinyl candy canes and pressed them on the collar for a fun extra pop! I also added a felt bow to the hat when I did Kennedy’s photo.
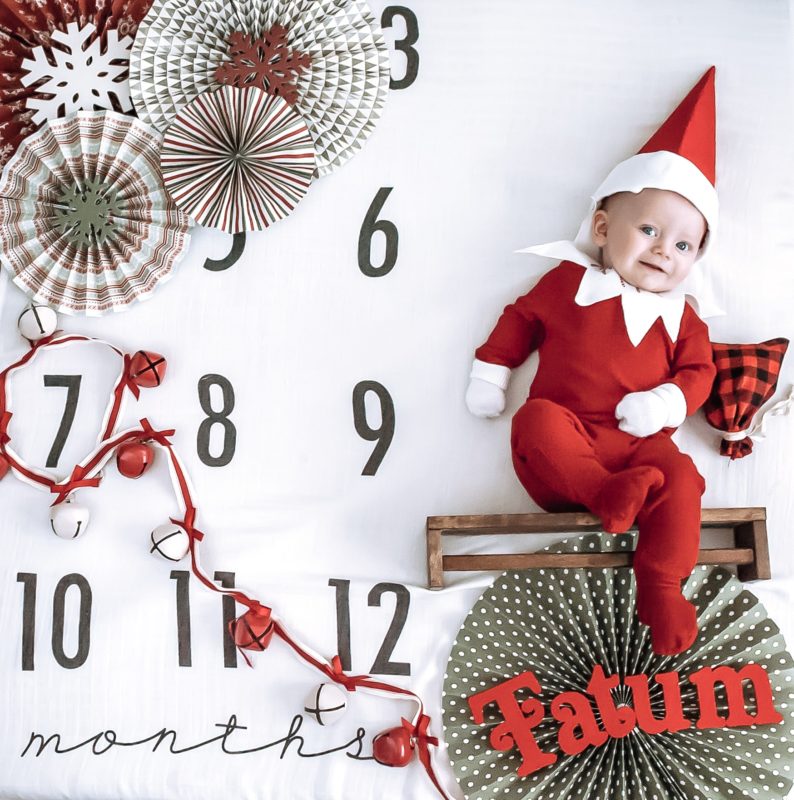
For these monthly photos I always set up in the same spot for consistent lighting, we used our coffee table since its the same size as the blanket and in natural lighting. We arranged the rosettes, shelf, bells and felt letters (cut on the Cricut) before getting the baby all ready.
We added the hat and socks on the hands last to keep baby happy!
Have you taken cute Christmas photos of your baby? I’d love to hear your fun ideas! Drop any questions you have in the comments section below!
If you enjoyed this post please share, and pin it for others to enjoy as well!
XO